You can use the Graphical Designer tab to map source metadata with target metadata and create mapping specifications. This method is useful even when source column names are different from target column names. After mapping source to target, you can set a target update strategy for the mappings and enter a description for the strategy.
You can create mapping specifications in the Graphical Designer tab using one of the following:
Creating Mapping Specifications using Metadata Search View
To create mapping specifications graphically, follow these steps:
- In the Workspace Mappings pane, click a map.
- Click the Graphical Designer tab.
- Click
 .
.
The Graphical Designer tab switches to edit mode.
You can use the Metadata Search View pane to drag and drop the required source table or column into the Graphical Designer. The Metadata Search View pane displays technical assets in a hierarchical manner similar to the Metadata Manager.
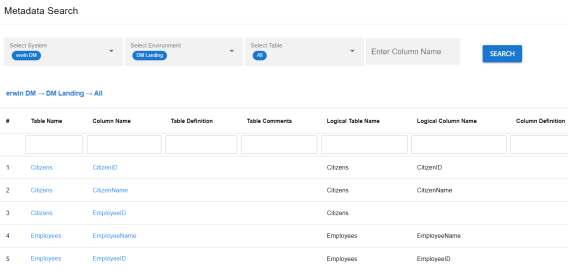
Alternatively, click to open Metadata Search page. This page enables you to search for tables or columns in the metadata by selecting appropriate values.
- Expand a parent node to view its assets, and select the required asset.
For example, open a system node to view relevant environments in it. Then, expand the environment node to view tables and columns respectively.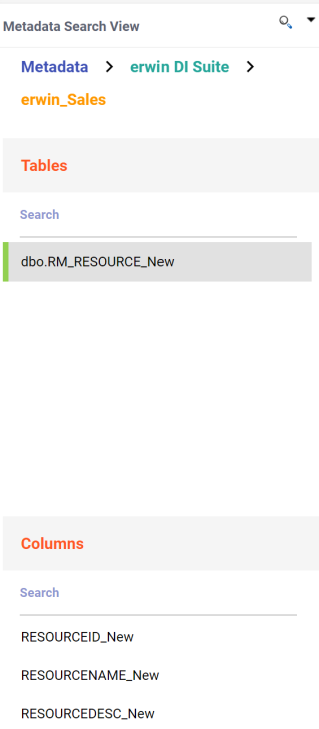
Alternatively, the search bars in the Metadata Search View enables you to search for specific environments, tables, or columns.
Hover over a table or a column and click to open Metadata Properties page. This page displays business, technical, and extended properties of the selected asset.
 - Drag the selected source table from the Metadata Search View pane and drop on the Graphical Designer tab.
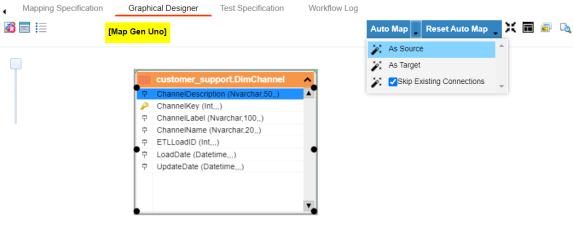
- On the Graphical Designer tab, select the source table and click
 next to the Auto Map option. Then, select As Source option to specify the table as source.
- Similarly, drag target table from the Metadata Search View pane and drop on the Graphical Designer tab.
- On the Graphical Designer tab, select the target table and click
 next to the Auto Map option. Then, select As Target to specify the table as target.
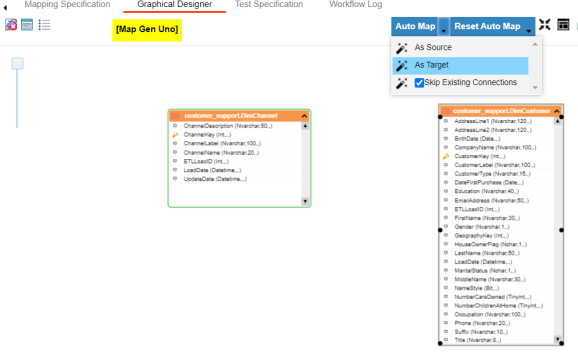
- Use the following options to map source with target:
- If the source and target have same column names, click Auto Map.
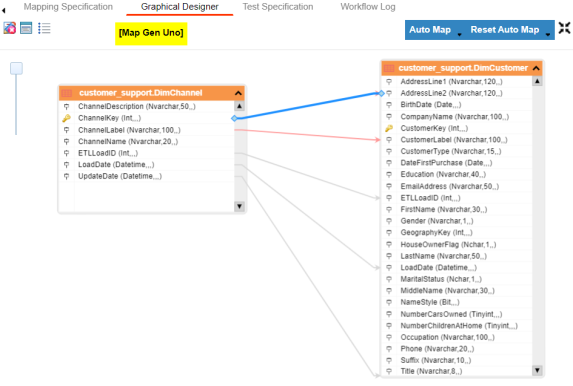
- If the source and target have different column names, then click and drag your mouse from a source column to the required target column.
The source and target columns are mapped.
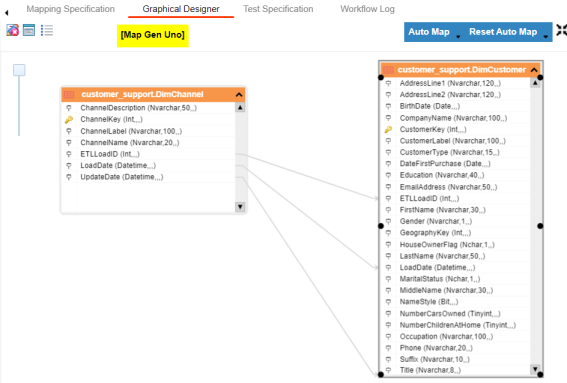
The source and target columns are mapped. Repeat the process for the required assets.
-
Click
 .
.
By default, the Mapping Specification tab opens.

The following page appears.
The mapping specification is saved.
Creating Mapping Specifications using Metadata Tree View
To create mapping specifications graphically, follow these steps:
- In the Workspace Mappings pane, click a map.
- Click the Graphical Designer tab.
- Click
 .
. - Drag the selected source table from the Metadata Tree View pane and drop on the Graphical Designer tab.
Alternatively, click to use the search function on the Metadata Tree View pane to locate the required asset in the list.
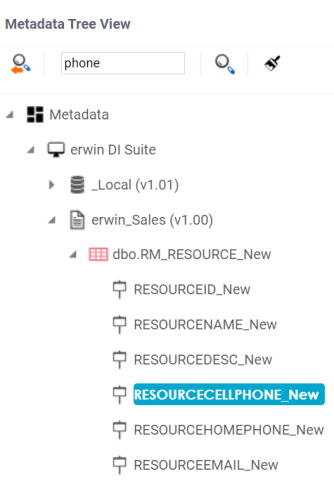
- On the Graphical Designer tab, select the source table and click
 next to the Auto Map option. Then, select As Source option to specify the table as source.
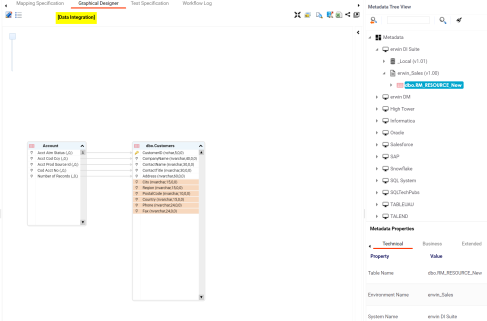
- Drag the selected target table from the Metadata Tree View pane and drop on the Graphical Designer tab.
- On the Graphical Designer tab, select the target table and click
 next to the Auto Map option. Then, select As Target to specify the table as target.
- Use the following options to map source with target:
- If the source and target have same column names, click Auto Map.
- If the source and target have different column names, then click and drag your mouse from a source column to the required target column.
For example, the following image displays the source and target columns are mapped automatically.

For example, the following image displays the source and target columns (blue and red arrows) that are mapped manually.

-
Click
 .
.
By default, the Mapping Specification tab opens.

The following page appears.
The mapping specification is saved.
Setting Target Update Strategy
To set the target update strategy, follow these steps:
- Expand the Additional Mapping Information pane and click the Target Update Strategy tab.
- On the Target Update Strategy tab, click
 .
.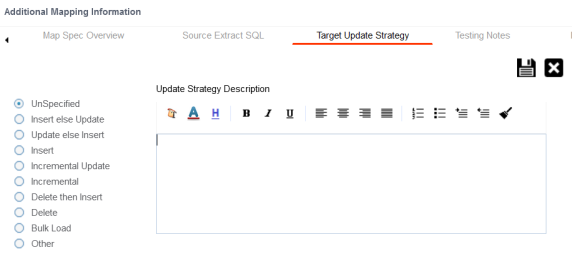
- Click the required strategy, enter Update Strategy Description, and click
 .
. - Click
 .
.The source to target mapping is saved.
This pane is available at bottom of the central pane when you click a map in the Graphical Designer tab.
The target update strategy is set for the mapping specification.
You can enrich a mapping specification by:
- Adding transformation and lookup details
- Associating code cross walks (code mappings)
- Associating reference tables
- Linking requirements
After creating a mapping specification, you can analyze a mapping specification. Analyzing mapping specifications involves:
- Generating virtual preview of target
- Previewing data
- Performing table gap analysis
- Performing column gap analysis
- Running impact analysis
- Running lineage analysis
- Running end to end lineage
- Opening business view
- Viewing mapping statistics
|
Copyright © 2022 Quest Software Inc. |